Showing posts with label recipes. Show all posts
Friday
Farm Fresh Recipes: Swiss Chard Crepes
This post can now be seen on my other site, The Free Range Life. Here is the link to the recipe for Swiss Chard Crepes.
Labels:
chard,
Farm Fresh Recipes,
garden,
garden recipes,
recipes
Sunday
Farm Fresh Recipes: Crustless Chard Quiche
Labels:
chard,
Farm Fresh Recipes,
garden,
garden recipes,
gardening,
kale,
recipes
Monday
{Goat Milk} Vanilla Bean Ice Cream with Cajeta Swirl
I am waiting on new cultures to arrive before I can make more cheese and we were getting a little overrun with milk. Yesterday I made a half a gallon of yogurt and used another half gallon of milk to make cajeta in the crock pot. We have made dulce de leche in the crock pot before using store bought condensed milk, but I wanted to try it with with our fresh goat milk.
It took all day to cook down, but it is so, so good. It tasted a little like a mix between caramel and butterscotch.
To Make Cajeta:
1/2 gallon goat milk
2 cups sugar
Seeds of 1 vanilla bean
dash of cinnamon/ 1 cinnamon stick
1 tsp baking soda dissolved in 1 T water
You can make this on the stovetop (quicker, but more hands-on) or in the crock pot (much longer, but does not require constant attention). I went with the crock pot so I didn't have to stand and stir for hours.
Place the milk, vanilla, cinnamon and sugar in the crock pot and turn on to high. Stir every so often until the milk is hot and sugar is dissolved. Stir in the baking soda water. Continue cooking on high stirring every so often. I just stirred as I came into the kitchen, maybe once an hour or so. Keep the lid off since the goal is for the milk to reduce and caramelize. It took about 12 hours to thicken up to the consistency I wanted (like a sauce/topping) if you want it thicker just cook a little longer.
And this morning Annika and I made vanilla bean ice cream to go with our cajeta. Sometimes I make the more involved ice cream by making a custard with eggs, milk and sugar but today I went the simple route.
To Make Vanilla Bean Ice Cream (raw):
2 cups raw goat milk
1 cup goat milk yogurt
3/4 cup sugar
Seeds of 1 vanilla bean
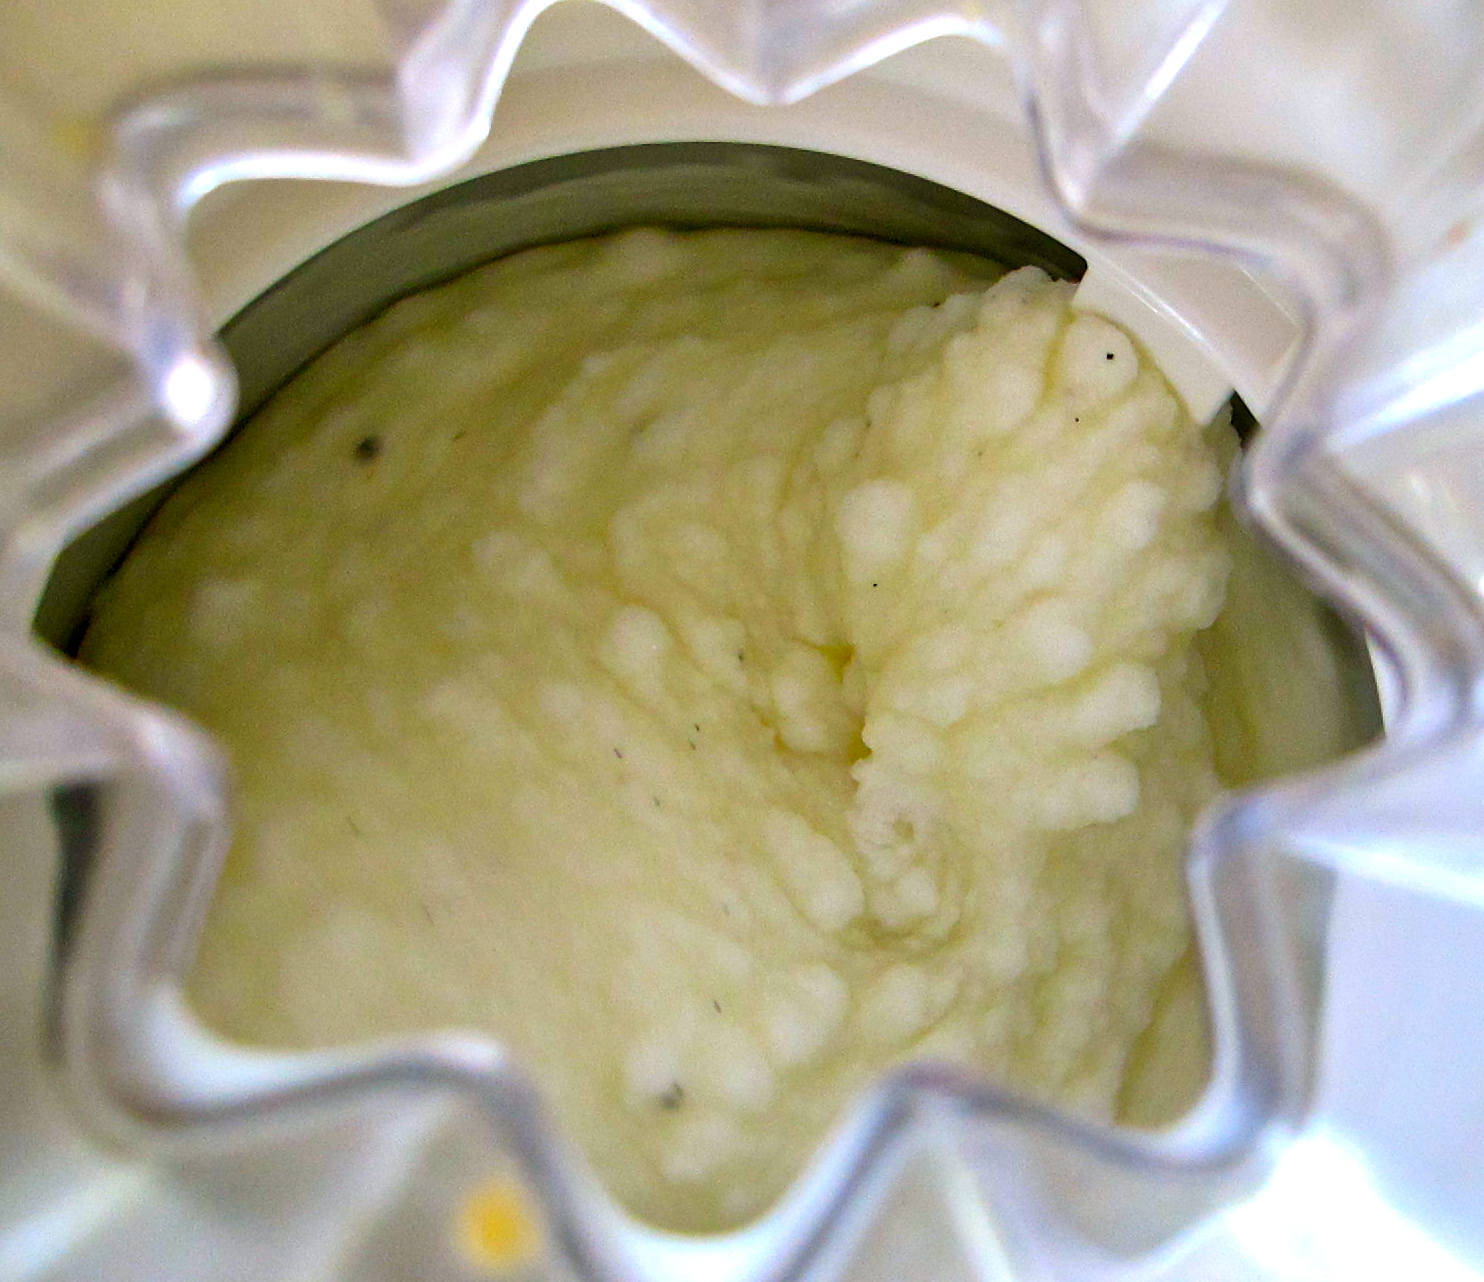
Whisk all of this together and pour into a 1.5 qt ice cream maker and mix as the machine instructs. The key here is to have 3 cups of liquid. You can use a combination of heavy cream, whole milk, skim milk etc. The lower the fat the less creamy the ice cream will be. I choose 2 cups of whole, raw goat's milk and 1 cup of yogurt this time to see how the yogurt affected the consistency.
We also swirled about 1/2 cup of our cajeta into the ice cream just as it finished processing.
It wasn't quite all the way frozen by lunch time....but it was still really good!
It took all day to cook down, but it is so, so good. It tasted a little like a mix between caramel and butterscotch.
To Make Cajeta:
1/2 gallon goat milk
2 cups sugar
Seeds of 1 vanilla bean
dash of cinnamon/ 1 cinnamon stick
1 tsp baking soda dissolved in 1 T water
You can make this on the stovetop (quicker, but more hands-on) or in the crock pot (much longer, but does not require constant attention). I went with the crock pot so I didn't have to stand and stir for hours.
Place the milk, vanilla, cinnamon and sugar in the crock pot and turn on to high. Stir every so often until the milk is hot and sugar is dissolved. Stir in the baking soda water. Continue cooking on high stirring every so often. I just stirred as I came into the kitchen, maybe once an hour or so. Keep the lid off since the goal is for the milk to reduce and caramelize. It took about 12 hours to thicken up to the consistency I wanted (like a sauce/topping) if you want it thicker just cook a little longer.
And this morning Annika and I made vanilla bean ice cream to go with our cajeta. Sometimes I make the more involved ice cream by making a custard with eggs, milk and sugar but today I went the simple route.
To Make Vanilla Bean Ice Cream (raw):
2 cups raw goat milk
1 cup goat milk yogurt
3/4 cup sugar
Seeds of 1 vanilla bean
Whisk all of this together and pour into a 1.5 qt ice cream maker and mix as the machine instructs. The key here is to have 3 cups of liquid. You can use a combination of heavy cream, whole milk, skim milk etc. The lower the fat the less creamy the ice cream will be. I choose 2 cups of whole, raw goat's milk and 1 cup of yogurt this time to see how the yogurt affected the consistency.
We also swirled about 1/2 cup of our cajeta into the ice cream just as it finished processing.
It wasn't quite all the way frozen by lunch time....but it was still really good!
Tuesday
Dried "Pineapple" Zucchini
This post can now be found on The Free Range Life. Here is the recipe for making Dried Pineapple Zucchini.
Sunday
Cale Cooks: Crock Pot Lasagna
I had the boys write out a list of goals for the year last week. 10 of them. When they handed me their lists I saw some fun and easy goals and some really good long terms goals to work toward. One of Cale's was to make dinner 5 times a month. He already knew what he wanted to make:
Lasagna.
When Annika was born we received 2 from friends delivering meals. Cale was in love. And to tell the truth- I have never made one. It seemed like a lot of work and preplanning- when I could just make spaghetti. (Cale likes baked spaghetti too, which falls under the same category for me...and he made that earlier this week for the Cub Scout Blue and Gold Banquet)
So he got all the supplies we lacked at the store and today he made dinner. Earlier in the week I came across a recipe for Crock Pot Lasagna and thought that it would be the perfect for him.
We changed it up just a bit, so here is the altered recipe:
4 cups tomato sauce ( I used our frozen Roasted Tomato Sauce from the summer)
8oz block of mozzarella cheese
15 oz container of ricotta cheese
1/2 cup grated Parmesan cheese
uncooked lasagna noodles (he used more than half of a 16 oz pkg)
- Mix all of the cheeses together in a bowl
- Place 1 cup of sauce at the bottom of your crock pot
- Layer noodles on top- break them up to cover the entire surface
- spread 1/3 of the cheese on top of the noodles
- Repeat these layers 2 more times
- Top with the final cup of sauce
- Cover and cook on low for 3-4 hours. The original recipe said 4, ours was done much sooner. I turned off the crock pot at about 3 hours and just let it sit until dinner which was 2+ hours later.
Serve and enjoy!
Wednesday
Beans, Beans are Good For Your Heart....
We've been experimenting a lot lately. With less grains in our diet, less refined sugar, more protein. The kids have actually really surprised me with their willingness to try my creations. This past couple weeks the star ingredient has been beans.
It started when I was searching around for new recipes that were grain-free friendly. I came across Diet, Dessert and Dogs. And while browsing the posts and links and all of that I found a recipe for Chocolate Bean Butter. The day before I had made a bunch of chickpeas for veggie burgers (and no-meatballs) and there was a bunch left. So I decided to try it. I altered the recipe a bit to use what I had on hand, but it was really, really good. The boys had it with peanut butter and waffles for lunch. They begged for more. And I will admit to eating it straight from the bowl as well.
Then last week I made a big batch of navy beans- intending to use them for dinner. Then I got roped into a game of Monopoly- which you know is never quick, even playing with the quick game option. So about 2 hours later when the game was over I realized the beans were way past done, and way past being used as actual beans in any dish. So they went into the refrigerator until I could figure out what to do with them. The next day we had bean-waffles. Basically milk, mashed beans and eggs. It tasted a lot like cornbread actually. Then I added a bit of flour and baking powder and they tasted very similar to my normal waffles.
Tonight we had muffins. Peanut butter muffins. Which my boys decided to call Bean-nut Butter Muffins...
They turned out really good. I think I actually prefer them to my normal peanut butter muffins and they have a ton of protein in them- which is really good for Cohen- who won't eat eggs, meat, plain beans, etc.
And on to the recipes....
Bean-Nut Butter Muffins
2 cups mashed beans ( I used navy)
4 eggs
1/4 cup honey (more if you like sweeter muffins)
1/4-1/2 cup natural peanut butter
1 tsp vanilla
2 tsp baking powder
1/2 cup almond meal (bought, self ground or you can use whatever flour you want)
Mix the first 5 ingredients well. Add the almond meal and baking powder and combine. Pour into muffin tins and bake at 375 for about 15-20 min until a toothpick comes out clean. I used my muffin top pan- which is why they are flat, the ones baked in the standard pan rose just like any other muffin.
And if you want, top it with Chocolate Bean Butter.
Chocolate Bean Butter
2 cups mashed beans (I've used chickpeas and navy- both were good)
5 T cocoa powder
1/4-1/2 cup Maple Syrup (add a little add a time until it is as sweet as you like)
3 T melted coconut oil
optional: 1/4 cup peanut butter
Combine all ingredients in a food processor and blend until very smooth.
disclaimer: all measurements are approximate. I didn't actually measure anything at all when making these recipes- but based on my experience in eye-balling ingredients these should be pretty close)
Friday
Polpette di Melanzane
Okay, so really they are just baked eggplant balls but the Italian name sounds nicer.
Our eggplant plant are very prolific this year and aside from breaded, baked and topped with cheese and sauce I was having trouble finding something that the kids would eat.
Then I made these and they gobbled them up.
Our eggplant plant are very prolific this year and aside from breaded, baked and topped with cheese and sauce I was having trouble finding something that the kids would eat.
Then I made these and they gobbled them up.
3 large eggplants (or a variety of small ones, usually I cover 2 baking sheets with the sliced eggplant)
~2 cups Panko bread crumbs
1 egg
2 cloves garlic
1 onion
salt and pepper to taste
A handful of fresh basil and oregano
1/2 cup Parmesan cheese
olive oil
First peel and slice the eggplant and place on a baking sheet. Drizzle with olive oil and roast for 30-45 min at 350*.
When they are done, transfer them to the food processor. Add in the onion and garlic and blend until smooth. Stir in the egg, Parmesan and bread crumbs. Add the fresh herbs and pulse to combine. Season with salt and pepper to your taste.
Spray your baking sheets and form the mixture into "meatballs". It should be soft, but workable. Bake at 350* for about 25 minutes until golden and slightly crusty.
Roasted Tomato Sauce
Tomatoes are our big crop. I plant a lot of plants and we bring in more tomatoes than anything else. When it comes to preserving them though...I am not too fond of the standard process. Most canning guides have you boil them, ice them, skin them and take out the seeds. There are 2 things I don't like about that process. One, it takes way too long and way too many dishes. Two, it's a lot of waste. I want to use all the tomato.
I have been asked for my sauce recipe. I posted it a couple years ago, Val at Collecting the Moments has posted her version as well.
Here's what you will need:
tomatoes
garlic
onion
olive oil
balsamic vinegar
salt and pepper
basil
oregano
And I will warn you, I am one of those process cooks as opposed to a recipe follower....
Step one is to halve your tomatoes and place them in a large roasting pan. I tend to over-fill mine. I use mostly Roma tomatoes as there is less water in them and more meat. But when I make this my pan looks like the picture below. And this is a large, Thanksgiving turkey kind of roasting pan.
Next up, onion. I use about 1 medium. Cut in quarters. You can omit it or add more depending on your taste.
Sprinkle liberally with [sea] salt, pepper, drizzle with olive oil and balsamic vinegar. Don't skimp on either of these.

Dig your hands in and toss it all up until everything is nice and coated. Then stick it in the oven for 45 minutes or so at 400*. You want the skins shriveled and starting to blacken in a couple places.
When it's done cooking, transfer the tomatoes to a large bowl. I use my crock pot. It's up to you whether or not to get all the juices. I find the sauce too thin when I add them all. So I just make sure to get all the onion, garlic and tomatoes.
Add a whole lot of fresh basil and oregano (I am sure dry would work too). Then blend it up. I use my immersion blender. I have used my food processor in batches too. Keep blending. Then give it a taste. Add more salt, pepper, balsamic, olive oil, a drizzle of honey...until it tastes how you want.
Then you can place it in jars, containers, freezer bags and freeze it for later. If you check out Val's page, she can tell you more about canning it....be sure to read the comments.
Then go out to the garden and repeat the process again.
Wednesday
Zucchini

Zucchini 1:

Made into Zucchini Garlic Herb Bread, one of my very favorite zucchini recipes

Zucchini 2:

Sauteed with garlic and onions and wrapped in homemade tortillas for lunch

Made into Zucchini Garlic Herb Bread, one of my very favorite zucchini recipes
Zucchini 2:

Sauteed with garlic and onions and wrapped in homemade tortillas for lunch
Monday
This and That
More random.
School.
Last week we studied reflection, diffused reflection and how the eye works.
We learned the parts of the eye and what they do and did an virtual eye dissection.
I made cookies to try out a new recipe and designs.
This one is supposed to be a Trillium... the best I can do at midnight.

and last month I entered this contest:

I made these Sweet Potato- Date Scones. I posted them over on Morning Glory Bakes, which is a blog I started to focus on my baking.
I got a call this past Friday that my recipe won in the Sugar Free category! They publicly announced the winners today on the Sweet Bytes Blog- check out all the other great sweet potato recipes! I am sure this fall after we harvest this year's crop I will be trying lots of these new recipes!
Saturday
Making Dough
I am always on the search for better clay recipes. For our history projects this past week we needed clay a couple times so I tried a few different versions. Here are some of my favorite new and old recipes.
Play Dough
This is the recipe I have used for years. I got it from one of my frequently referenced books during my preschool teaching days.
2 cups water
2 cups flour
1 cup salt
t tsp cream of tartar
2 T oil
food coloring
Mix the flour, cream of tartar and salt in a saucepan. Mix the water, oil and food coloring together then add it to the pot. Turn the heat on to medium and stir. Stir continuously until a ball forms that pulls away from the sides of the pan. Remove from heat and turn out on to a plate/board/counter. It will be hot, but as soon as you can knead it until it is nice and smooth. This stays soft forever! Store in an air tight container.
Salt Ceramic
2 cups salt
1 1/2 cups of water
1 cup cornstarch
Mix all the ingredients into a saucepan and stir over medium heat until the mixture forms a ball. Turn out and knead until smooth.
This one is grainy, like salt, but it dries rock hard and is very pretty. Sort of sparkly. I've used in the in past for ornaments and we used it last week for our cuneiform tablets.
Air-Dry Modeling Clay:
1 cups cornstarch
1 1/2 cup water
2 cups baking soda
Mix the cornstarch and baking soda together in a saucepan. Slowly add water while stirring. Heat over medium-low heat. Cook and stir until thick and forms a ball. Remove from heat and knead until smooth.
This one is really smooth. We used it for our sumerian seals and out Mohenjo-Daro house last week and I really liked the texture of it. It dries really hard and smooth too.
Play Dough
This is the recipe I have used for years. I got it from one of my frequently referenced books during my preschool teaching days.
2 cups water
2 cups flour
1 cup salt
t tsp cream of tartar
2 T oil
food coloring
Mix the flour, cream of tartar and salt in a saucepan. Mix the water, oil and food coloring together then add it to the pot. Turn the heat on to medium and stir. Stir continuously until a ball forms that pulls away from the sides of the pan. Remove from heat and turn out on to a plate/board/counter. It will be hot, but as soon as you can knead it until it is nice and smooth. This stays soft forever! Store in an air tight container.
Salt Ceramic
2 cups salt
1 1/2 cups of water
1 cup cornstarch
Mix all the ingredients into a saucepan and stir over medium heat until the mixture forms a ball. Turn out and knead until smooth.
This one is grainy, like salt, but it dries rock hard and is very pretty. Sort of sparkly. I've used in the in past for ornaments and we used it last week for our cuneiform tablets.
Air-Dry Modeling Clay:
1 cups cornstarch
1 1/2 cup water
2 cups baking soda
Mix the cornstarch and baking soda together in a saucepan. Slowly add water while stirring. Heat over medium-low heat. Cook and stir until thick and forms a ball. Remove from heat and knead until smooth.
This one is really smooth. We used it for our sumerian seals and out Mohenjo-Daro house last week and I really liked the texture of it. It dries really hard and smooth too.
Friday
24 Days of Christmas: Day 10 and 11
Day 1o:
Scandinavia
Glögg
1 liter grape juice
2 cinnamon sticks
10 cloves
pinch of ginger
brown sugar to taste
combine juice and spices and simmer for about 10 minutes. Add brown sugar to taste. Serve hot.
We drank ours while reading from Joy to the World: Christmas Stories from Around the World
(more recipes)
Day 11:
Denmark
Ris ala Mande
I combined a couple different recipes, based on what we had in the house already....so here was my recipe:
4 cups milk
1 cup rice
3/4 cup sugar
1 vanilla bean
whipping cream
1/2 cup chopped almonds*
1 whole almond
* we didn't have these, so I didn't put them in.
Bring milk, sugar and vanilla to a boil, add rice. Reduce temperature as low as it will go and simmer until the milk is absorbed. (1-2 hours depending on heat). I stirred mine every so often since rice likes to stick to my pot. Cool rice completely.
Whip heavy cream ( I added a couple T of sugar) until stiff peaks form. Fold into cool rice.
Add the whole almond. Whoever gets the bowl with the almond is said to have good luck and receive a special gift.
other recipes
This is the first time I have ever made or eaten a rice pudding. It reminded me of tapioca, which I do like....but probably not something I'd ever make again. My boys didn't care for it all that much either. I think we'll stick with our cookies instead....
Scandinavia
Glögg
1 liter grape juice
2 cinnamon sticks
10 cloves
pinch of ginger
brown sugar to taste
combine juice and spices and simmer for about 10 minutes. Add brown sugar to taste. Serve hot.
We drank ours while reading from Joy to the World: Christmas Stories from Around the World
(more recipes)
Day 11:
Denmark
Ris ala Mande
I combined a couple different recipes, based on what we had in the house already....so here was my recipe:
4 cups milk
1 cup rice
3/4 cup sugar
1 vanilla bean
whipping cream
1/2 cup chopped almonds*
1 whole almond
* we didn't have these, so I didn't put them in.
Bring milk, sugar and vanilla to a boil, add rice. Reduce temperature as low as it will go and simmer until the milk is absorbed. (1-2 hours depending on heat). I stirred mine every so often since rice likes to stick to my pot. Cool rice completely.
Whip heavy cream ( I added a couple T of sugar) until stiff peaks form. Fold into cool rice.
Add the whole almond. Whoever gets the bowl with the almond is said to have good luck and receive a special gift.
other recipes
This is the first time I have ever made or eaten a rice pudding. It reminded me of tapioca, which I do like....but probably not something I'd ever make again. My boys didn't care for it all that much either. I think we'll stick with our cookies instead....
Wednesday
24 Days of Christmas: Day8 and 9
Day 8:
American/Family Traditions
A Trip to the Tree Farm
We live less than a mile from a wonderful Christmas tree farm, and we look forward to going all year. The weather was rainy yesterday, but there was a short break and we jumped in the car.
Rylan, who begged and begged to get the tree yesterday, came home mad. The tree wasn't right. It wasn't big enough. But he was out voted 5 to 1 and we brought this one home. But I suspect it was the fact that he didn't make the decision more than the tree that made him mad. He pouted for awhile, but as soon as we put the tree in place he quietly said- 'It looks bigger inside than it did outside' and help to decorate it.
Day 9:
Austria
Linzer Cookies
We have a trip to the local Fire Station tomorrow so I planned our activity today so that we would have something to bring for the fire fighters.
I found an easy recipe- so these aren't *real* Linzer cookies- there are no nuts in them. And I used our homemade peach jam for the filling.
Cale was my helper, as usual. Rylan helped some. The younger ones didn't have any interest.
Here was our recipe:
Cookies:
2 cups Flour
1/2 tsp baking soda
1/4 tsp salt
1/4 tsp cinnamon
3/4 cup sugar
1/2 cup butter
1 egg
grated orange/lemon rind
for tops:
jam/preserves (raspberry is usual, we used peach)
powdered sugar
Cream butter and sugar. Add egg. Add in dry and mix. The dough will be dry so you may have to knead it with your hands to form a ball. Chill it for easier handling. Roll out dough to about 1/4 in thickness.
You will need 2 cutter- one small, one larger. I used 2 stars. Cut the dough using the larger cutter, then using the smaller one, cut out the center of 1/2 the cookies. Bake at 350 for about 8 minutes.
Once cooled, spread the jam on the bottom cookie and place the cookie with the center cut out on top. Sprinkle with powdered sugar.
Labels:
24 days of Christmas,
baking,
Cale,
holidays,
homeschooling,
recipes
Saturday
24 Days of Christmas: Day 4 and 5
Sweden
2 tsp ginger
2 tsp cinnamon
2 tsp cloves
1 tsp baking
soda
1/2 tsp salt
1 cup sugar
1 cup butter
1 egg
1/2 cup molasses
Cream butter and sugar. Add egg and molasses. Blend in dry ingredients well. Let the dough set overnight in the refrigerator. Roll out dough to 1/8 in thickness on a well floured surface. Cut out with cookie cutters. Bake at 350 for 8-10 min.
Subscribe to:
Posts (Atom)