Friday

Sea Turtles

Reading Lesson:
Sea Turtles by Gail Gibbons
All About Turtles by Jim Arnosky

Art Lesson:
Based off of the Foil Turtle and Fish Collage Lesson from Deep Space Sparkle

drawn, outlined, then paintedCale's
---------------------------------------------------------------
Cohen's
--------------------------------------------
Rylan's
----------------------------------------------------

Writing Lesson:

Poetry

Cale's on the Green Sea Turtle

Rylan's on the Leatherback Sea Turtle

They plan to make green paper sea turtles and rewrite their poems on those...but first we need to make a construction paper run....we are down to black, pink and brown.....

Sunday

Fall Decorations....Boy-Style


The boys have been on a decorating kick lately. It all started with this:


They glued and nailed a bunch of old wood together added some paper ghosts and colored some little wooden bits orange for pumpkins...

We had a bit of disagreement on how to hang it. They were certain that it had to be hung from a rod that was attached to a hook that was nailed to the wall. I wasn't about to nail a rod permanently to my wall. I told them they could just hang it by string from an existing nail in the wall....but apparently the rod was non-negotiable. They worked it in...and did hang it from the existing nail.

This witch started as a cutting practice for Cohen while the older boys were doing book work. I drew all the pieces and he cut them out and glued them together. Then he strung it in the kitchen with a couple ghosts...


Rylan made one soon after and hung it from the highest part of our ceiling.
Cale's hangs from our dining room light...We finally got pumpkins this year too....Cohen and Rylan picked out white ones that we will cook and eat after Halloween. But he didn't want a plain old pumpkin....

Here's Cohen's finished pumpkin complete with witch hat, yarn hair, feet, arms and Cohen sized hands.

Rylan kept his more simple with a drawn on face...

Cale wanted an actual jack-o-lantern...

Which we carved today

Wednesday

Sweet Potato Poppy Seed Muffins


So Rylan has been begging for Lemon Poppy Seed Muffins for awhile. We have the poppy seeds but not the lemon. He found a recipe for plain poppy seed muffins in my cookbook yesterday and wanted them tonight. I have been wanting to make sweet potato muffins since, well, we have over 75 lbs sitting in our living room. So we mixed the two. Here is my basic recipe...I didn't write it down, and I didn't measure some of the ingredients.

Sweet Potato Poppy Seed Muffins

1/2 cup butter
2/3 (or less) cup sugar
3/4-1 cup mashed sweet potatoes
2 eggs
1/4 cup of milk
1 tsp vanilla
2 cups flour
2 tsp baking powder
1 tsp baking soda
2 tsp cinnamon
2 T poppy seeds

Cream the butter and sugar together. Add the eggs one at a time. Add the sweet potatoes, vanilla and milk. Mix until combined. Add all the dry ingredients to the bowl and mix until just moistened. Bake at 350 for about 20-25 minutes.

Some notes: We used our white sweet potatoes. They do have a different flavor than the orange. We weren't looking for them taste like pumpkin/squash/sweet potato muffins with lots of cinnamon and nutmeg. We wanted the lighter flavor. I am sure they would taste good to with the above orange fleshed additions and extra spices.

Monday

Growing Season 2009-Wrap up


Last night we had the first frost. This afternoon the boys and I spent the afternoon pulling wilted plants and weeds out of the garden. I added up our final totals for the season

2009 total:


* 584.09 lbs *


That includes....
231.85 lbs of tomatoes
78.0 lbs of sweet potatoes
57.77 lbs or 101 cucumbers


30.99 lbs or 148 green peppers
29.4 lbs or 35 ears of corn
21.7 or 12 butternut squashes
24.0 lbs of strawberries


43.85 lbs or 21 cantaloupes
27.4 lbs of peas
and more....


We canned tomatoes,ketchup, salsa, jellies and pickles. I have a freezer full of tomato sauce, green beans, and green peppers. You would think my pantry/freezer is full, but it isn't really. We ate a lot as we got it and we have eaten some since we put it away. I can already see where we will have to increase if I want to store enough to actually make it to or near the following season.

Saturday

Chemistry Unit- Lesson 12


Lesson 12:
Acids and Bases


First off we made Turmeric Paper. To do this put 1/4 cup alcohol in a bowl and stir in 1/4 tsp of turmeric. Dip coffee filters in the solution until completely covered and yellow. Hang up or place on a cookie sheet to dry.
Once dry, cut them into strips. Now they can be used to test for bases....and acids.
(recipe taken from Janice VanCleave's Chemistry for Every Kid)

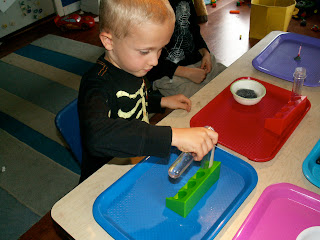
Now on to our experiment....

We had a very simple discussion on what acids and bases were. I mentioned that acids have excess hydrogen and bases have excess hydroxide. But mostly we talked about the properties....in terms they know....stomach acid, acid rain, sour, sharp, etc....

We had several solutions to test:
milk, lemon juice, hydrogen peroxide, water, baking soda, borax, saliva, vinegar, bleach water....

One by one we tested them using our turmeric paper....if they produced no change we knew it was not a base...either acid or neutral. If the strip turned red, the solution was basic.

Once we went through all the solutions one time, we retested those solutions that produced no change, but this time we tested them on the strips that were already red. If the strip stayed red....it was most likely neutral. If it turned back to yellow the solution was an acid.

Here's a sample of a basic solution:

Here's a sample of a acidic solution:

Once we ran through our tubes, they went to the kitchen and picked a couple more: apple juice, alcohol and pedialyte.

The results:

acids: lemon juice, peroxide, vinegar, bleach, apple juice and pedialyte
bases: baking soda (with water), borax (with water) and milk
neutral: tap water, alcohol and saliva
_________________

The End

And that concludes our chemistry unit....our 4 weeks are up and we are moving on to Rocks and Minerals....provided I can get it all planned in the next week. We've had a lot of fun with Chemistry though....so we might throw some random experiments in from time to time....

Thursday

Chemistry Unit- Lesson 11


Lesson 11:

Determining if a chemical change has occurred by observation of generation of heat.

Supplies:
1 tsp yeast, 1/4 cup hydrogen peroxide, stirring stick, thermometer

Record beginning temp of the peroxide (67 degrees)

Mix yeast into the peroxide and stir
The mixture begins to bubble and fizz....another sign that a chemical reaction is taking place. If you keep your hands on the outside of the bowl you can feel it begin to heat up.

Record ending temperature (90 degrees)

They were actually pretty amazed by this one. I keep listing the ways to tell if a chemical reaction has taken place....they've seen the bubbling, they've seen the gas given off.....I guess they didn't really believe that heat could actually be created by just mixing 2 things.

Wednesday

Chemistry Unit- Lesson 10

Lesson 10:

Chemical Changes

Objective: To see a color change as evidence of a chemical change
To see fizzing/bubbling as evidence of a chemical change


Supplies:
3 tubes, labeled #1-3
bleach
vinegar
hydrogen peroxide
3 tubes half full with water
food coloring

Procedure:
Place the bleach, peroxide, and vinegar in each of the tubes labeled #1-#3.
Drop one drop of food coloring in each of the water-filled tubes.


Place one dropper full of solution #1 into one water-filled tube. Observe. Continue for each of the 3 solutions.


The bleach will produce an immediate color change. The vinegar will produce none.

Over the next few minutes the tube with bleach added will become more and more colorless. I added the peroxide on this one. I thought it would produce some sort of change, considering it is used to bleach some things....but no change occurred. Even after adding more than one dropper full.


Experiment 2:

We've done this one before. But it was a hit then, and this time we talked a little more about the why behind it and what was taking place.

Step 1: Fill up a bottle/tube about half way with vinegar
Step 2: Funnel a couple of tablespoons of baking soda into a balloon.


Step 3: carefully stretch the neck of the balloon over the bottle. Be sure not to allow the baking soda to fall into the bottle yet.
Step 4: Lift the balloon to allow the baking soda to fall into the bottle and mix with the vinegar. You may want to hold on to the neck of the bottle/balloon just in case.
Step 5: Watch! The balloon will inflate as the reaction between the vinegar and baking soda produces carbon dioxide.

Tuesday

The Tellico River

Today we went down to the Cherohala Skyway, and Tellico River. We meant to do some hiking up there....but ended up going down to see Bald River Falls....Me, Cohen, Lakin and the puppy stayed up top and Rylan, Paul and Cale walked down to the bottom....

Cale fell in.

Then we went further down to the Tellico Trout Hatchery

Lakin was quite mesmerized by the fish.


We did stop along the way, to play in the river and jump on the rocks...


We brought the little mountain climbing puppy with us....


Cale fell in here too...


And in case anyone was wondering- this is Bandit. He recovered fine, he's growing really fast and fits in wonderfully with everyone, except maybe for Chopper (our Chihuahua)....

Monday

Chemistry Unit- Lesson 9

Lesson 9:
Physical or Chemical?
6 trays set up as follows:

tray 1: a bowl with an ice cube
tray 2: a tube containing vinegar and one containing baking soda.
tray 3: an apple, plate and a knife
tray 4: a tube containing vinegar and a bowl containing steel wool
tray 5: a plastic back containing a rock and a hammer
tray 6: a candle and a lighter
Their job was to determine whether a chemical change, physical change or both took place.

Phyiscal:
the ice- changes in state of matter
the rock- change in shape
the apple- change in shape


Chemical:

the apple- color change caused by oxidation
the steel wool- rust formation caused by oxidation
the baking soda and vinegar- bubbling, gas formation
the candle- gas formation, odor

We watched the candle (small, birthday cake candle) until it was completely gone. This showed even more than the previous experiment....the wax was almost completely vaporized, where as the previous one had a substantial pile of wax left once it was burned out. While it burned we talked about the parts of the flame. Where it is the hottest, coolest and what is going on in each part. We also talked about open flame safety rules.

I am also fairly certain I could give them a box of baking soda and a bottle of vinegar and they'd be entertained for a very long time.

Friday

Chemistry Unit- Lesson 7 and 8

Lesson 7:

Chemical and Physical Changes


We started by defining what a chemical change and a physical change is. Then they came up with some examples of each type. I also told them some of the ways to tell if a chemical change has occurred:

* a precipitate (I used the word solid for them) forms
* fizzing/bubbling
* a color change
*odor, heat or light is given off


Then we moved on to the experiment:

This was mostly observation. In the balance we set up foil, with clay (as a holder) and a candle and balanced it using other objects. We talked about the physical properties of the objects. Then we lit the candle and they talked about what they saw- the size of the candle changing, the wax melting to liquid then hardening back to solid. The smell in the smoke as the wick burned. And other chemical and physical changes the objects were undergoing.

Lesson 8:

Question: Did a physical or chemical change occur?

Hypothesis:
R: physical
C: chemical

Procedure:
Mix 3/4 cup of warm water, 1 cup glue and a few drops of food coloring in a bowl.
In a cup mix 1/2 cup warm water and 2 tsp borax.
While stirring slowly pour the borax solution into the glue solution.


Results:


(a solid forms!)

Conclusions:

A chemical change occured...


And it's a fun change too!